
Plan the rooms and the work
List each room and the surfaces you want painted: ceilings, walls, doors, skirting and window trim. Add photos of damage, stains and peeling. Decide whether rooms will be empty or occupied, and which spaces you need access to during the work.
For a new home, our new house painting guide covers trade coordination and handover. If the work is outside, use our exterior house painting guide for weather, cladding and access.
Choose colour and finish together
Start with fixed materials such as flooring and cabinetry, then compare physical colour samples in daylight and evening light. Our guide to choosing paint colours gives you a repeatable testing method.
Sheen changes how a surface reflects light and how marks show. Compare paint finishes before recording a colour, product and sheen for each surface. Include ventilation and room use when discussing low-VOC paint.
Prepare a clean, sound base
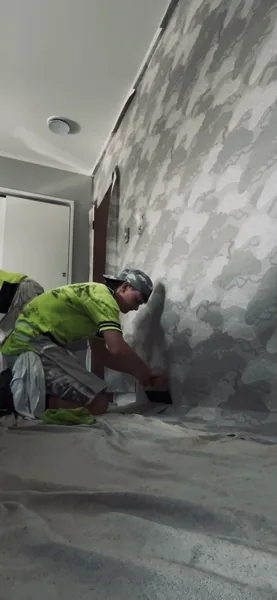
Protect floors and move furniture clear. Check for damp, loose paint and damaged plaster before cleaning with a product suited to the existing finish. Let the wall dry, repair defects, then smooth repairs and remove dust. Before sanding old coatings, establish whether lead paint or other hazardous materials need specialist management.
Our wall preparation guide and primer and undercoat comparison explain how to choose compatible preparation layers.
Set the quantity and application plan
Use our paint quantity calculator for an initial estimate from area, coats and the product's coverage rate. Treat primer and topcoat separately.
The application method depends on access, protection and finish. Compare spray painting and rolling before assuming one method suits the whole house. In wet rooms, bathroom ceiling preparation also needs a moisture and ventilation check.
Allow for drying and aftercare
Touch-dry, ready to recoat and fully cured are different stages. Use the selected product's stated recoat interval, then allow longer where its instructions require it in cooler or more humid conditions. Keep ventilation suitable throughout drying. A dry-feeling surface alone is not the signal to apply another coat.
Our paint drying guide explains the milestones. Keep the product details for cleaning painted walls once the finish has cured.
House painting tips: cutting in and rolling
Work from ceilings to walls, leaving the agreed trim stages until adjacent work is ready. Load a suitable brush lightly and cut a narrow band along the ceiling line, corners and edges. Keep your hand steady and avoid a heavy ridge. Cut in one manageable section, then roll it while the edge remains workable.
Distribute paint evenly with a sleeve suited to the coating and surface. Overlap each pass into the wet edge, keeping pressure light and the spreading rate consistent. Avoid repeatedly working paint that has begun to dry. Check coverage after the coat dries and follow the specified recoat interval.
Start here
Explore the detailed guides
- New Home Painters in ManawatūPlan new house painting with GDPD: surfaces, preparation, colours, trade sequencing and handover checks. Discuss your Manawatū new build.
- Paint Finishes: Choose the Right SheenCompare paint finishes and sheen levels for walls, ceilings and trim. Use GDPD’s room-by-room checklist and discuss the right finish for your repaint.
- Spray Painting vs RollerSpray painting vs roller: compare finish, masking, access and suitability for doors and rooms. Explore GDPD’s guide and discuss your painting project.
- Preparing Walls for PaintingHow to prepare walls for painting: inspect, clean, repair, sand and prime in the right order. Use GDPD’s checklist before planning your interior repaint.
- How to Clean Painted WallsHow to clean painted walls without changing the finish. Follow GDPD’s test-first method, stain checklist and aftercare advice for your home.
- How Long Does Paint Take to Dry?How long does paint take to dry? Understand touch-dry, recoat and cure times, with GDPD’s room-use checklist and practical planning advice.
- Painting Over Varnished WoodPainting over varnished wood: assess the finish, clean, prepare and test adhesion before painting. Read GDPD’s guide for doors, trim and interior timber.
- How to Choose Paint ColoursHow to choose paint colours: compare undertones, light and fixed finishes with GDPD’s practical sample-testing method. Plan your interior repaint.
- Low VOC Paint: What to CheckLow VOC paint in NZ: understand labels, low odour, product selection and ventilation. Use GDPD’s practical checklist when planning an interior repaint.
- Paint Primer vs UndercoatPaint primer vs undercoat: compare adhesion, sealing, stain blocking and finish build. Use GDPD’s surface checklist before planning your repaint.
- Painting a Bathroom CeilingPainting a bathroom ceiling: check moisture, prepare peeling paint and select a suitable coating. Follow GDPD’s checklist and discuss your repaint.
- Painting Skirting BoardsPainting skirting boards: clean, prepare, choose a trim finish and protect your flooring. Use GDPD’s practical guide when planning your room repaint.
- How Much Paint Do I Need?How much paint do I need? Use GDPD’s paint calculator and worked room example to estimate litres, coats and coverage before planning your repaint.
Turn your repaint ideas into a clear brief
Send us your room list, condition photos and preferred timing. We can discuss the preparation and finish for your home.
Request a quote